
Create projects in workspace

Updated step-by-step guide on how to create projects – in a workspace. If you are used to project management in ProoferHive, you can take a look at points 3 and 6 and skip the rest.
1. Your workspaces are listed on your start up page
If you start from the main dashboard: Select the current workspace (company/customer).
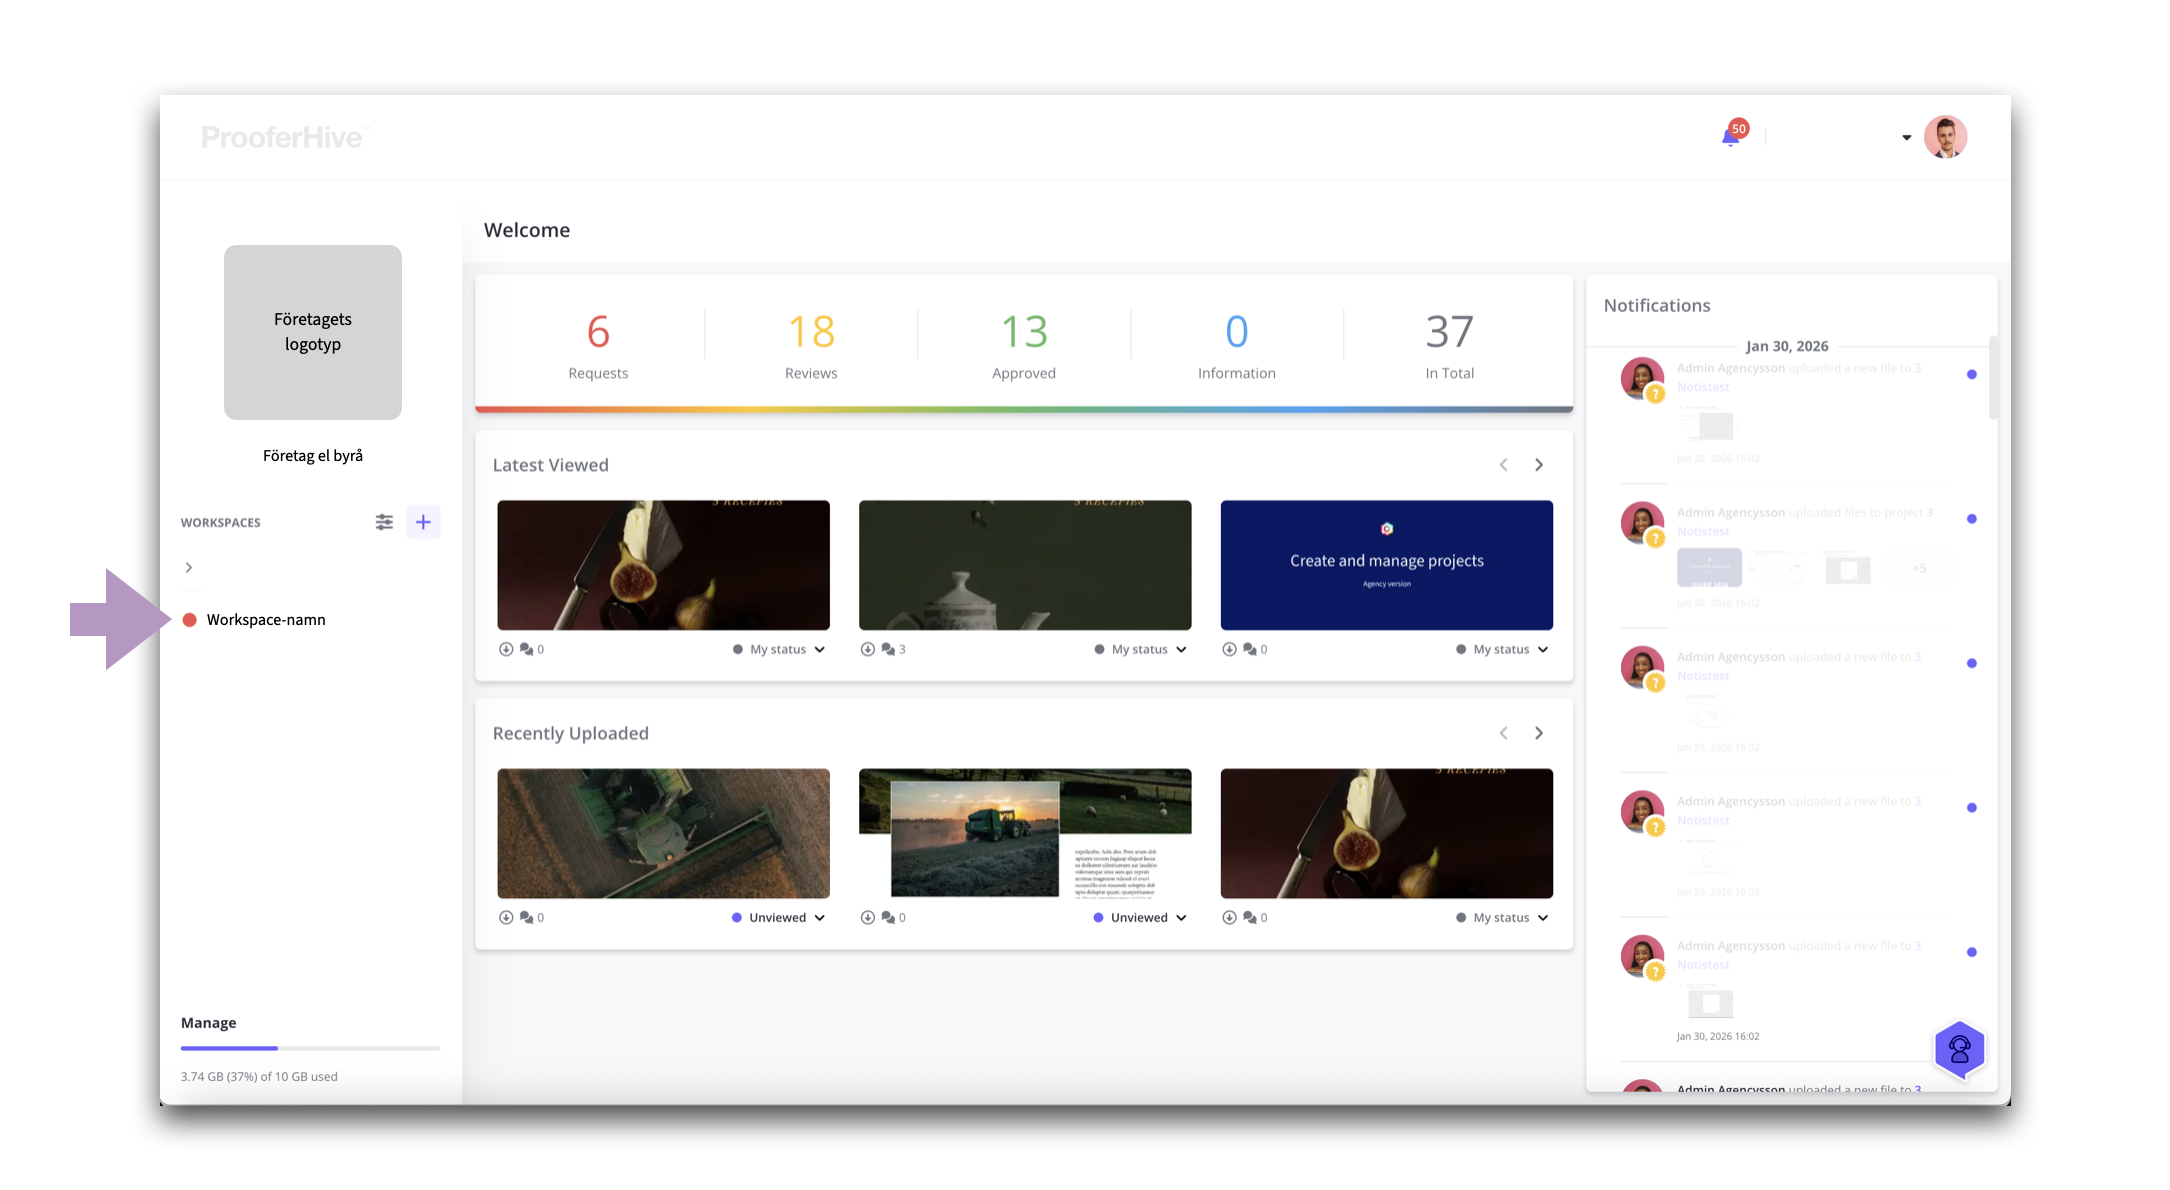
Select the current workspace.
From start all workspace names are identical to the company names the projects were originally created for.
With workspace, you can broaden your approach by creating more workspaces, for example to divide the company's operations into business areas, types of campaigns or other things.
This is beneficial when you want to be able to more easily see what type of project is attracting attention or if there are different constellations on the teams working on different types of projects and productions.
2. Project dashboard
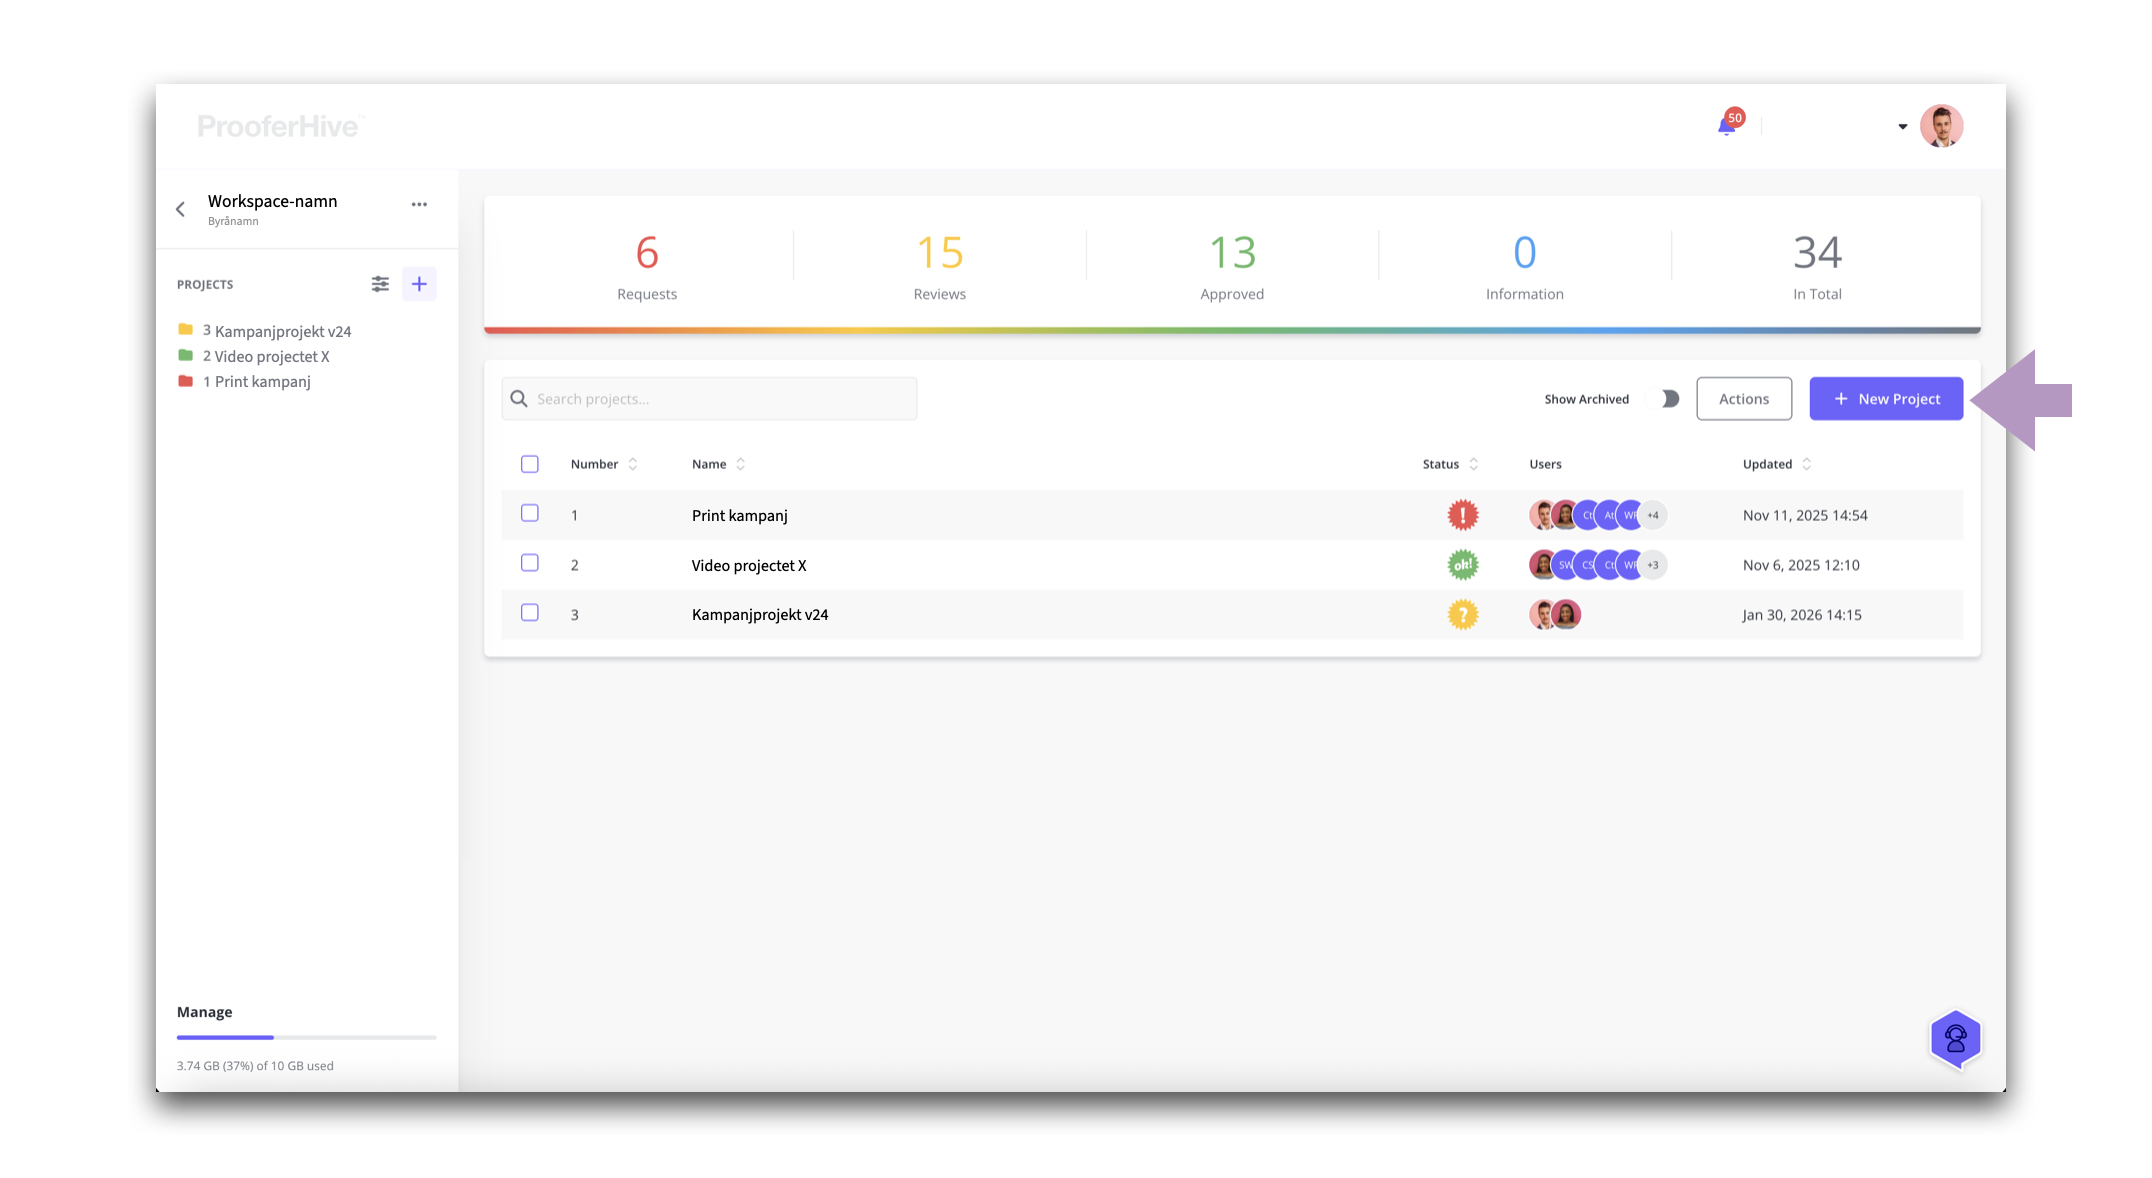
Create a project: Click on “+ New project”.
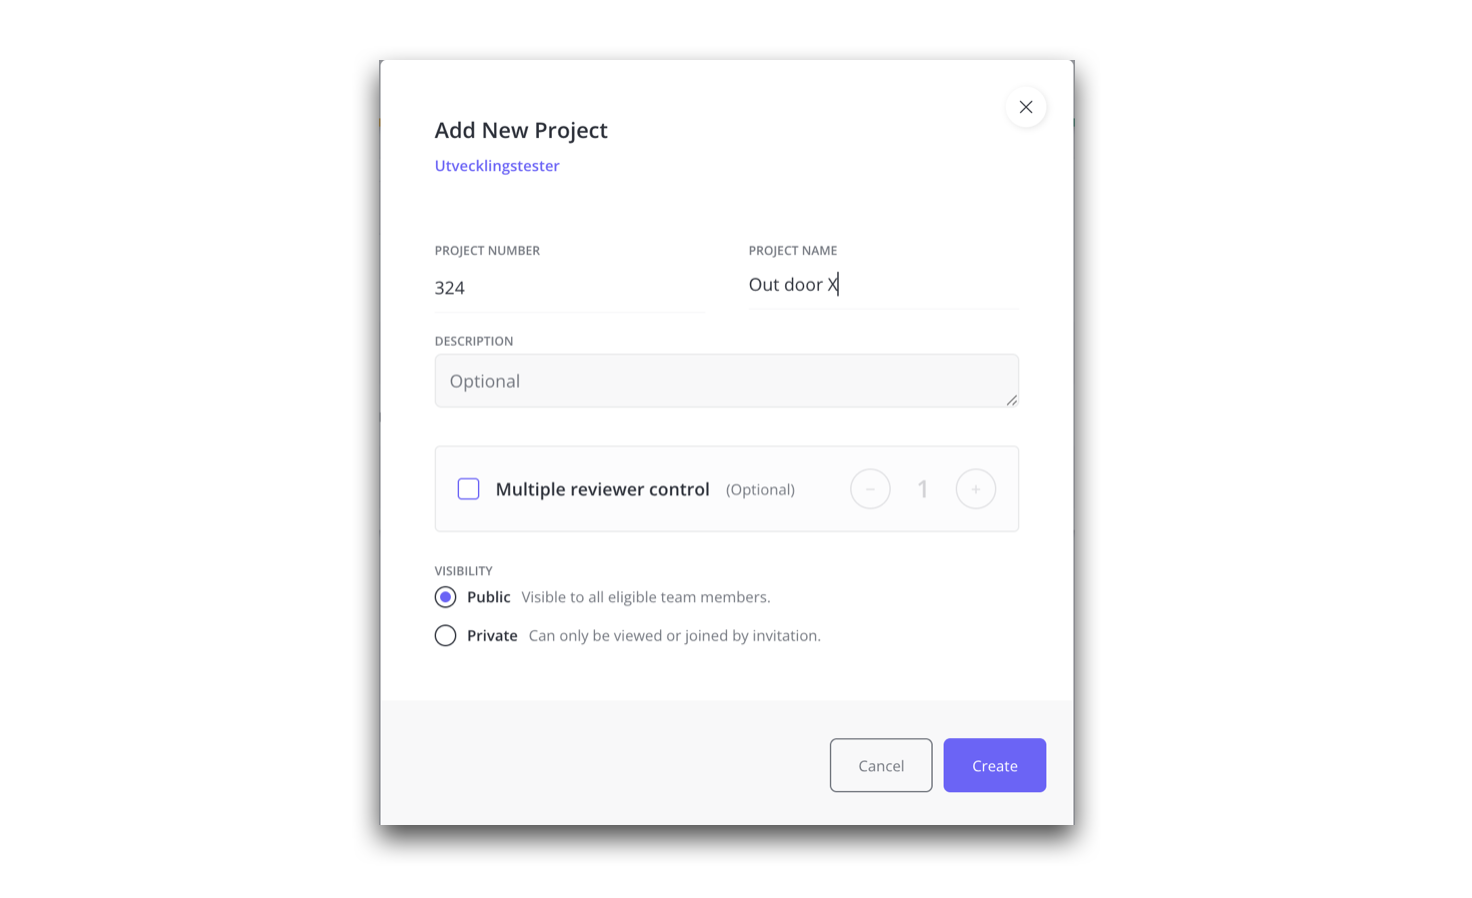
Modal : Add new project.
3. Public or private project
In the modal, enter the Project Number and Project Name and decide whether the project should be public or private (read page 4 in the guide. Click here).
In the modal you can also write a project description or a general message. "Description" is a free text field. An optional function for any text.
If you require more than one reviewer, then activate this. Read about "Multiple reviewer" here.
4. The new project is created

In the project view, you will be prompted to add a tab – where you can upload your files. Click the “pulsating” plus button.

Name the tab and click “Add tab”.
You can also set a deadline date here.
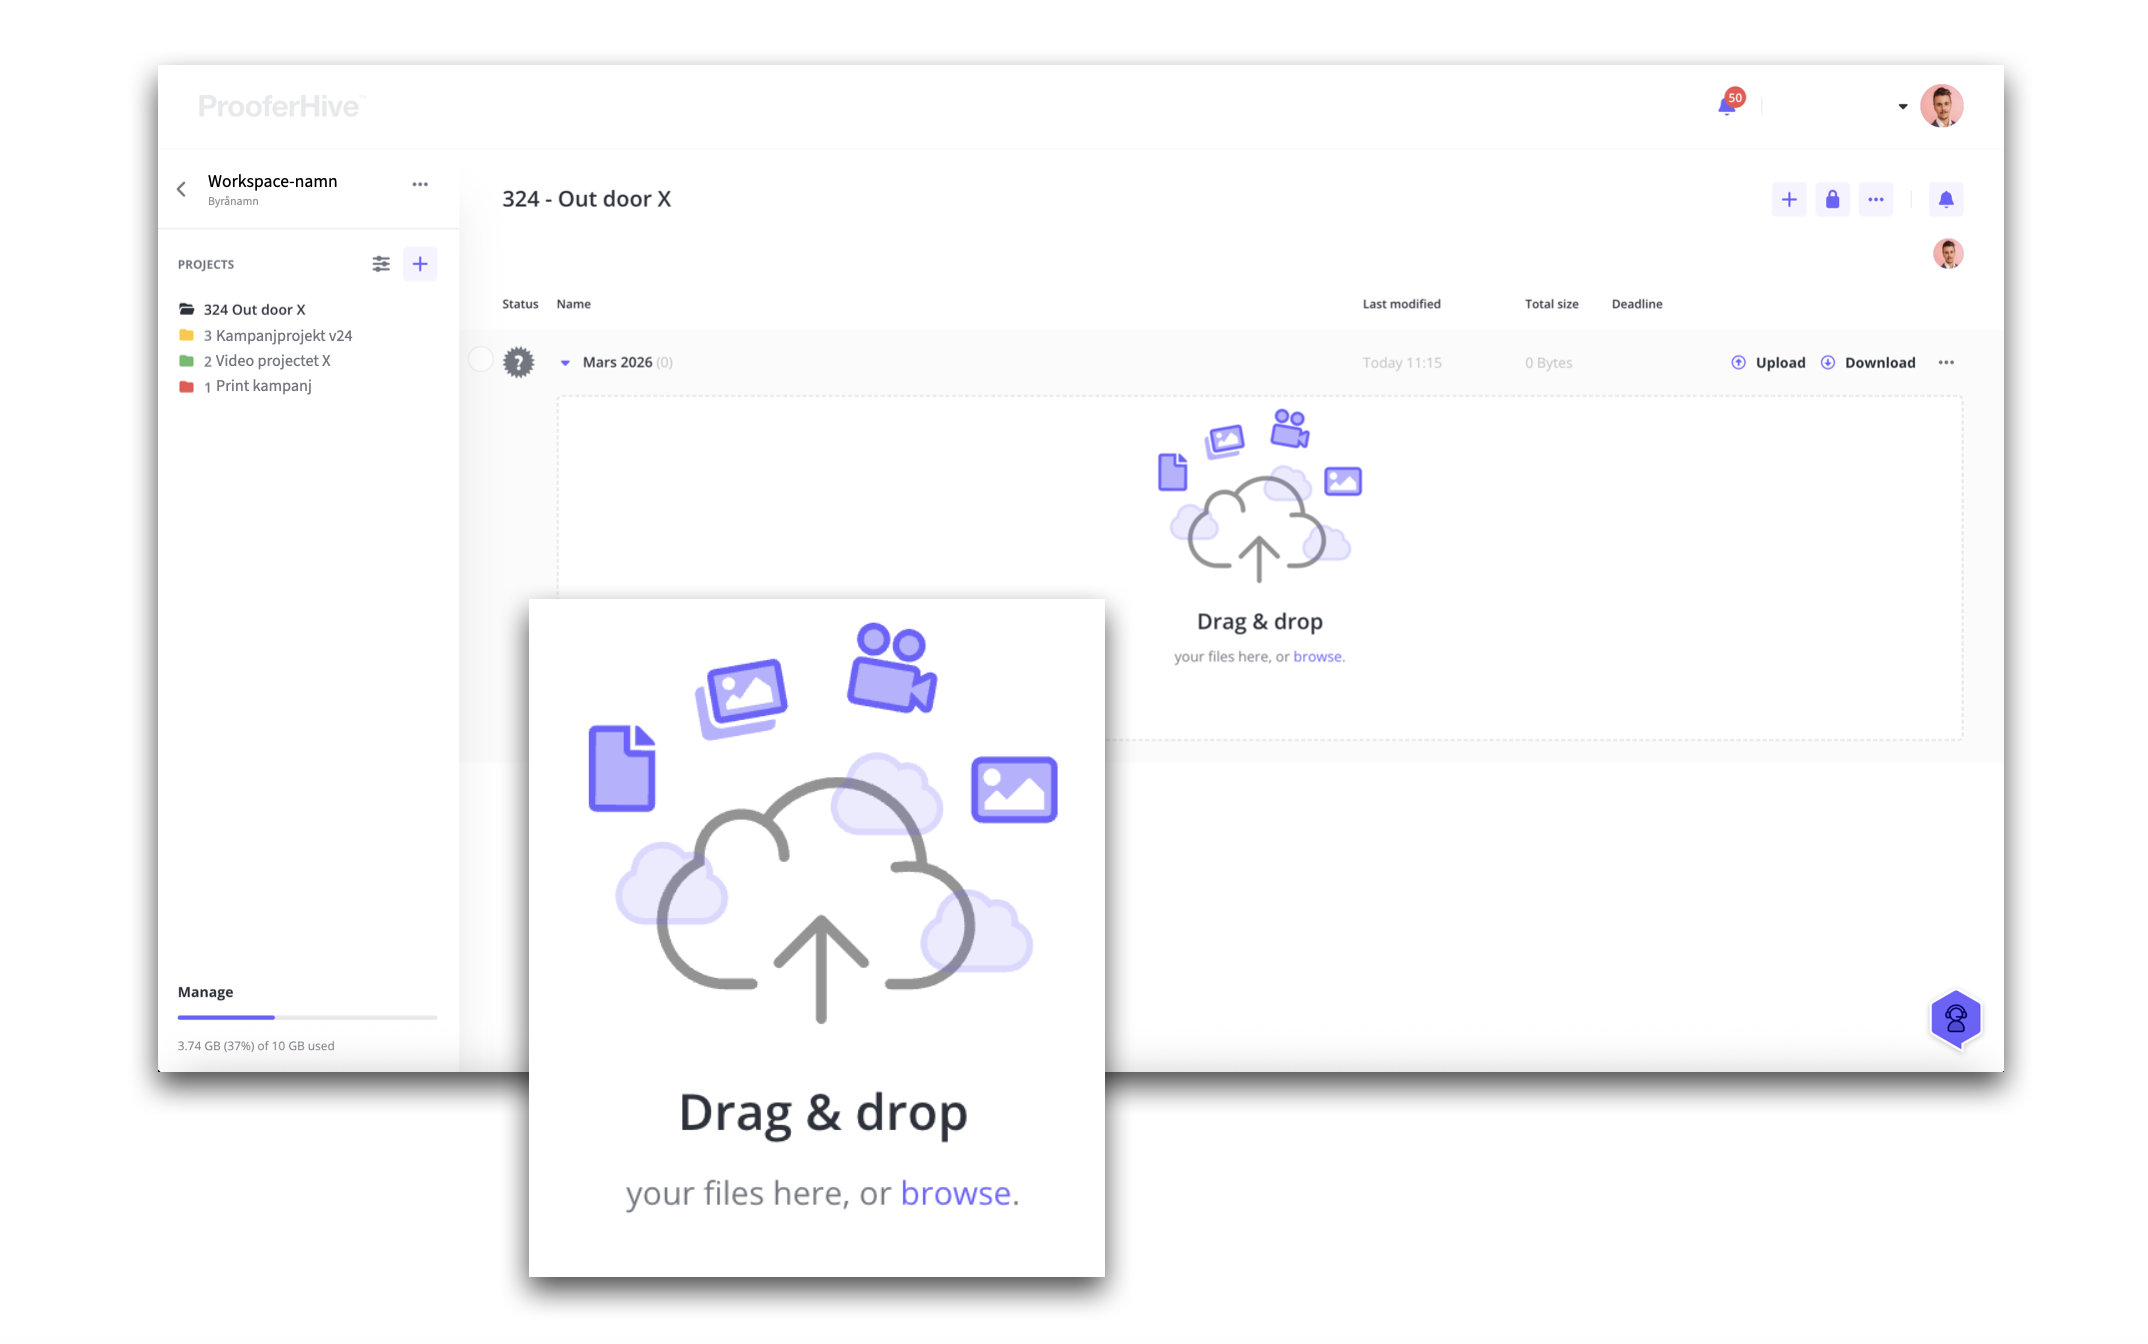
If you open the tab… (with the small arrow to the left of the tab name).
When you open the tab, you will be prompted to “drag and drop” your files (you can also drop files into a closed tab).
Or choose to upload via the tab’s “Upload button”.
5. Here you can change tracks – if you want

Choose the order that suits you.
You choose whether you want to invite participants first and upload the material afterwards. Or whether you want to structure the project first and then invite.
The most common is that agency teams are invited first and that reviewers are invited when it is time for them to start reviewing. And of course, there may be different times for different reviewers.
6. Here comes the new
Invite participants – members
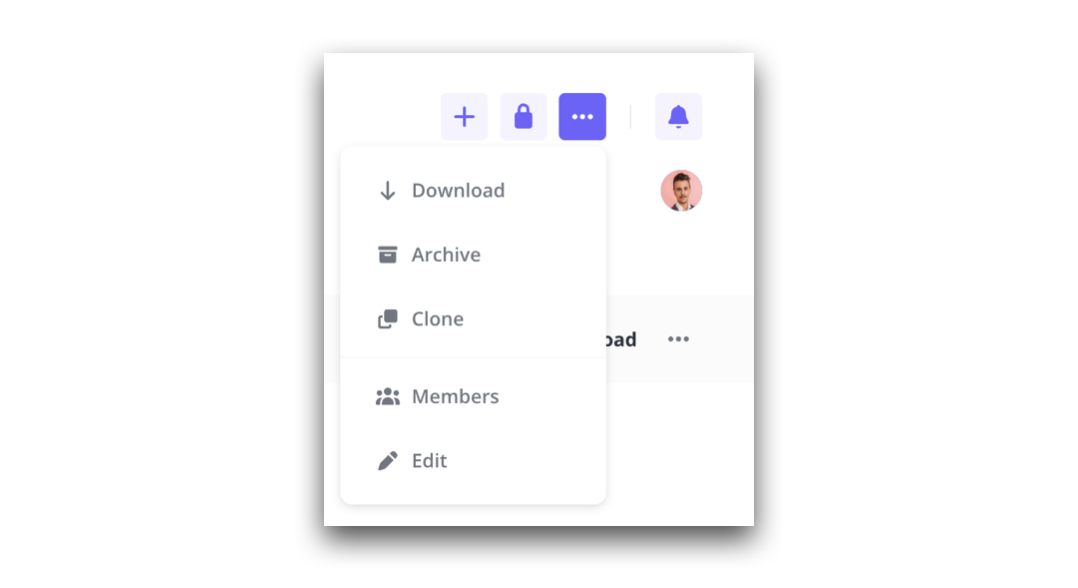
Click on the “three-dot menu” in the toolbox and select Members.
Modal where you manage project participants
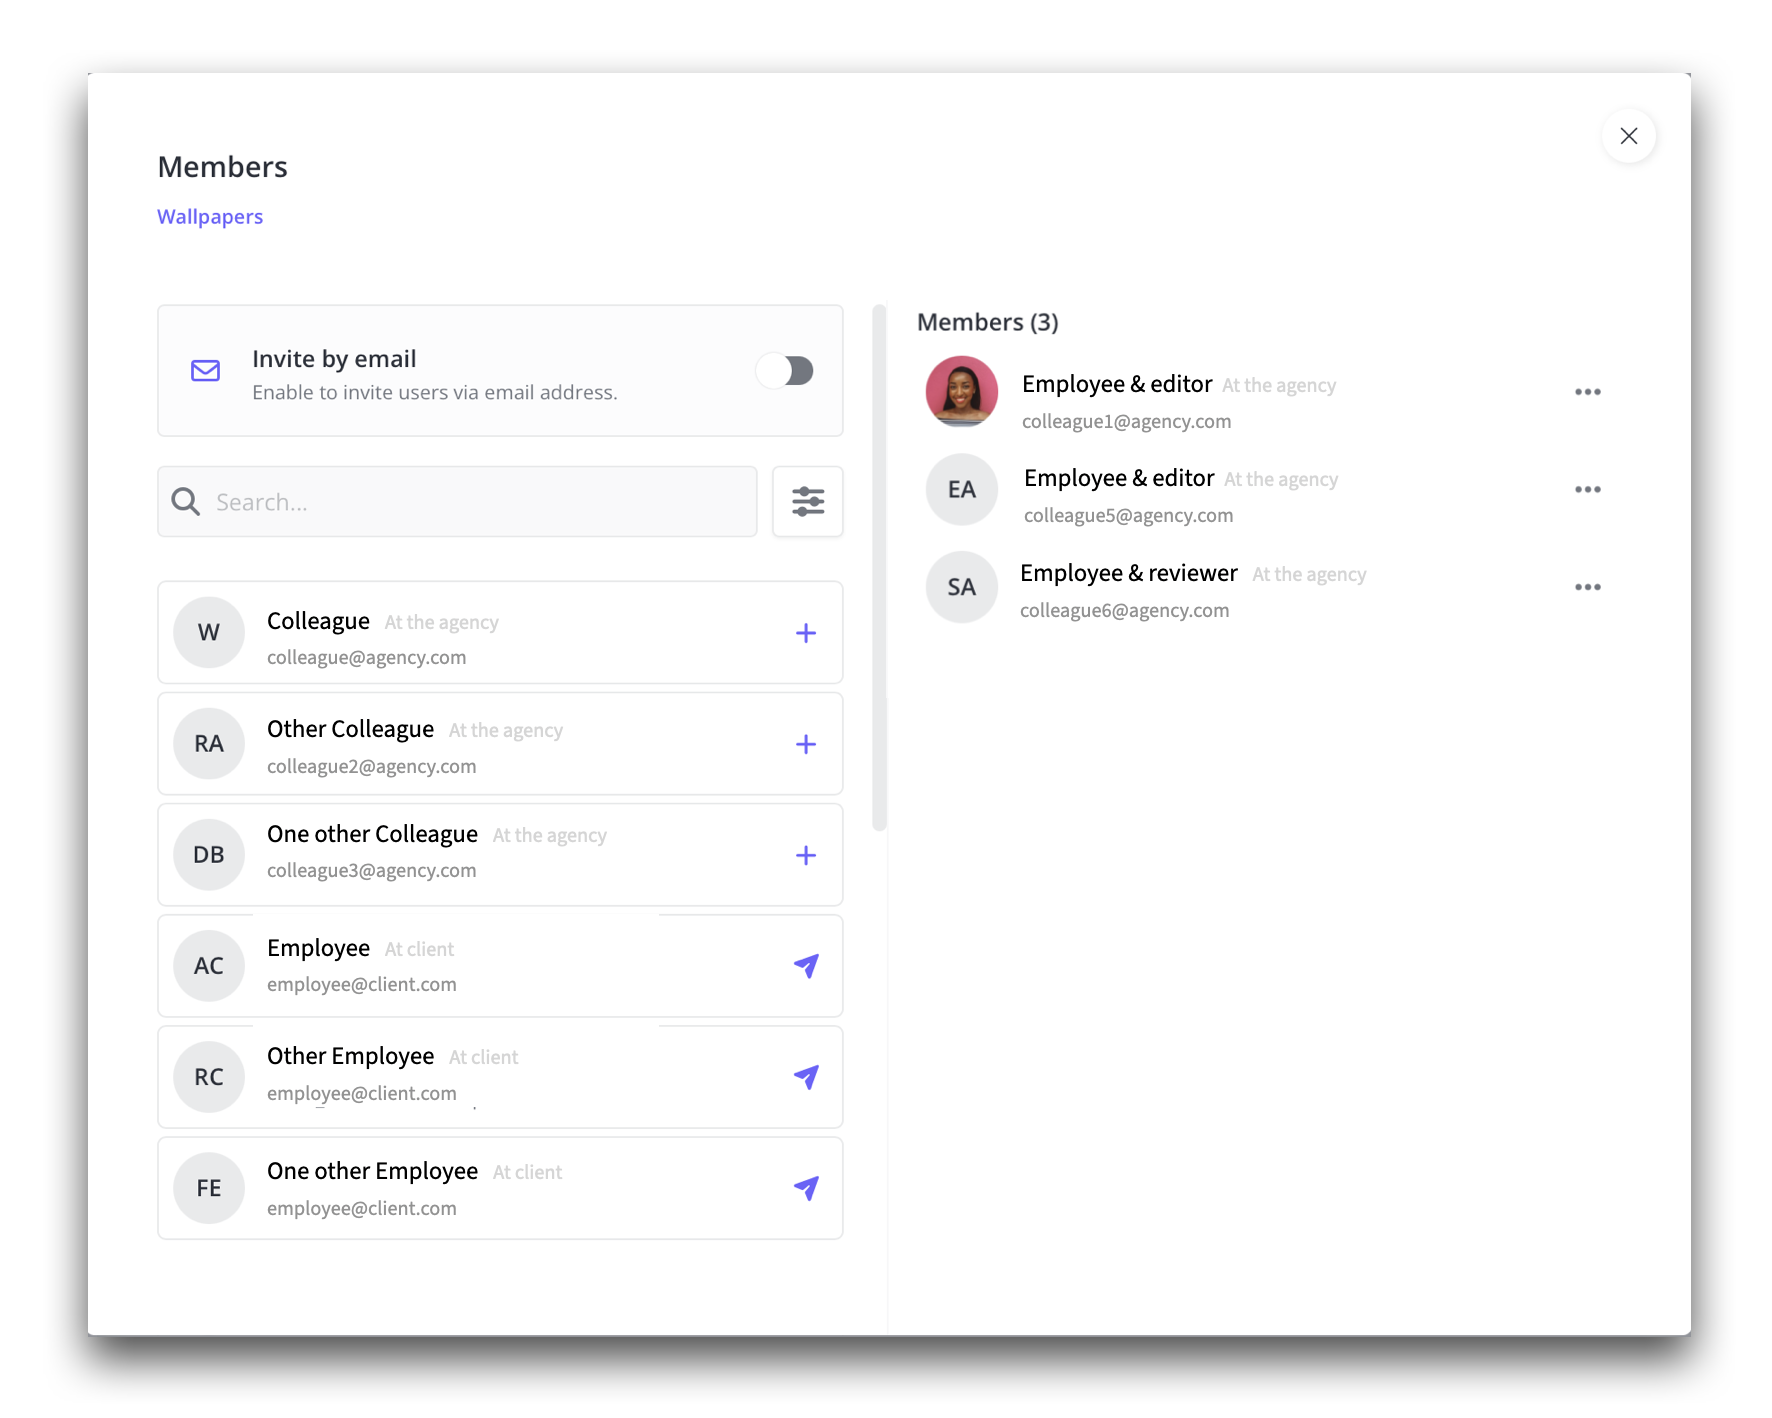
In the right column your project participants are listed.
You select participants in the left column – which then lands in the right column. Click on the plus sign (+) for participants on the agency page and on the “send icon” for reviewers and other participants.
Read more on pages 6-7 of the guide. Click here.
7. Back to project page and content
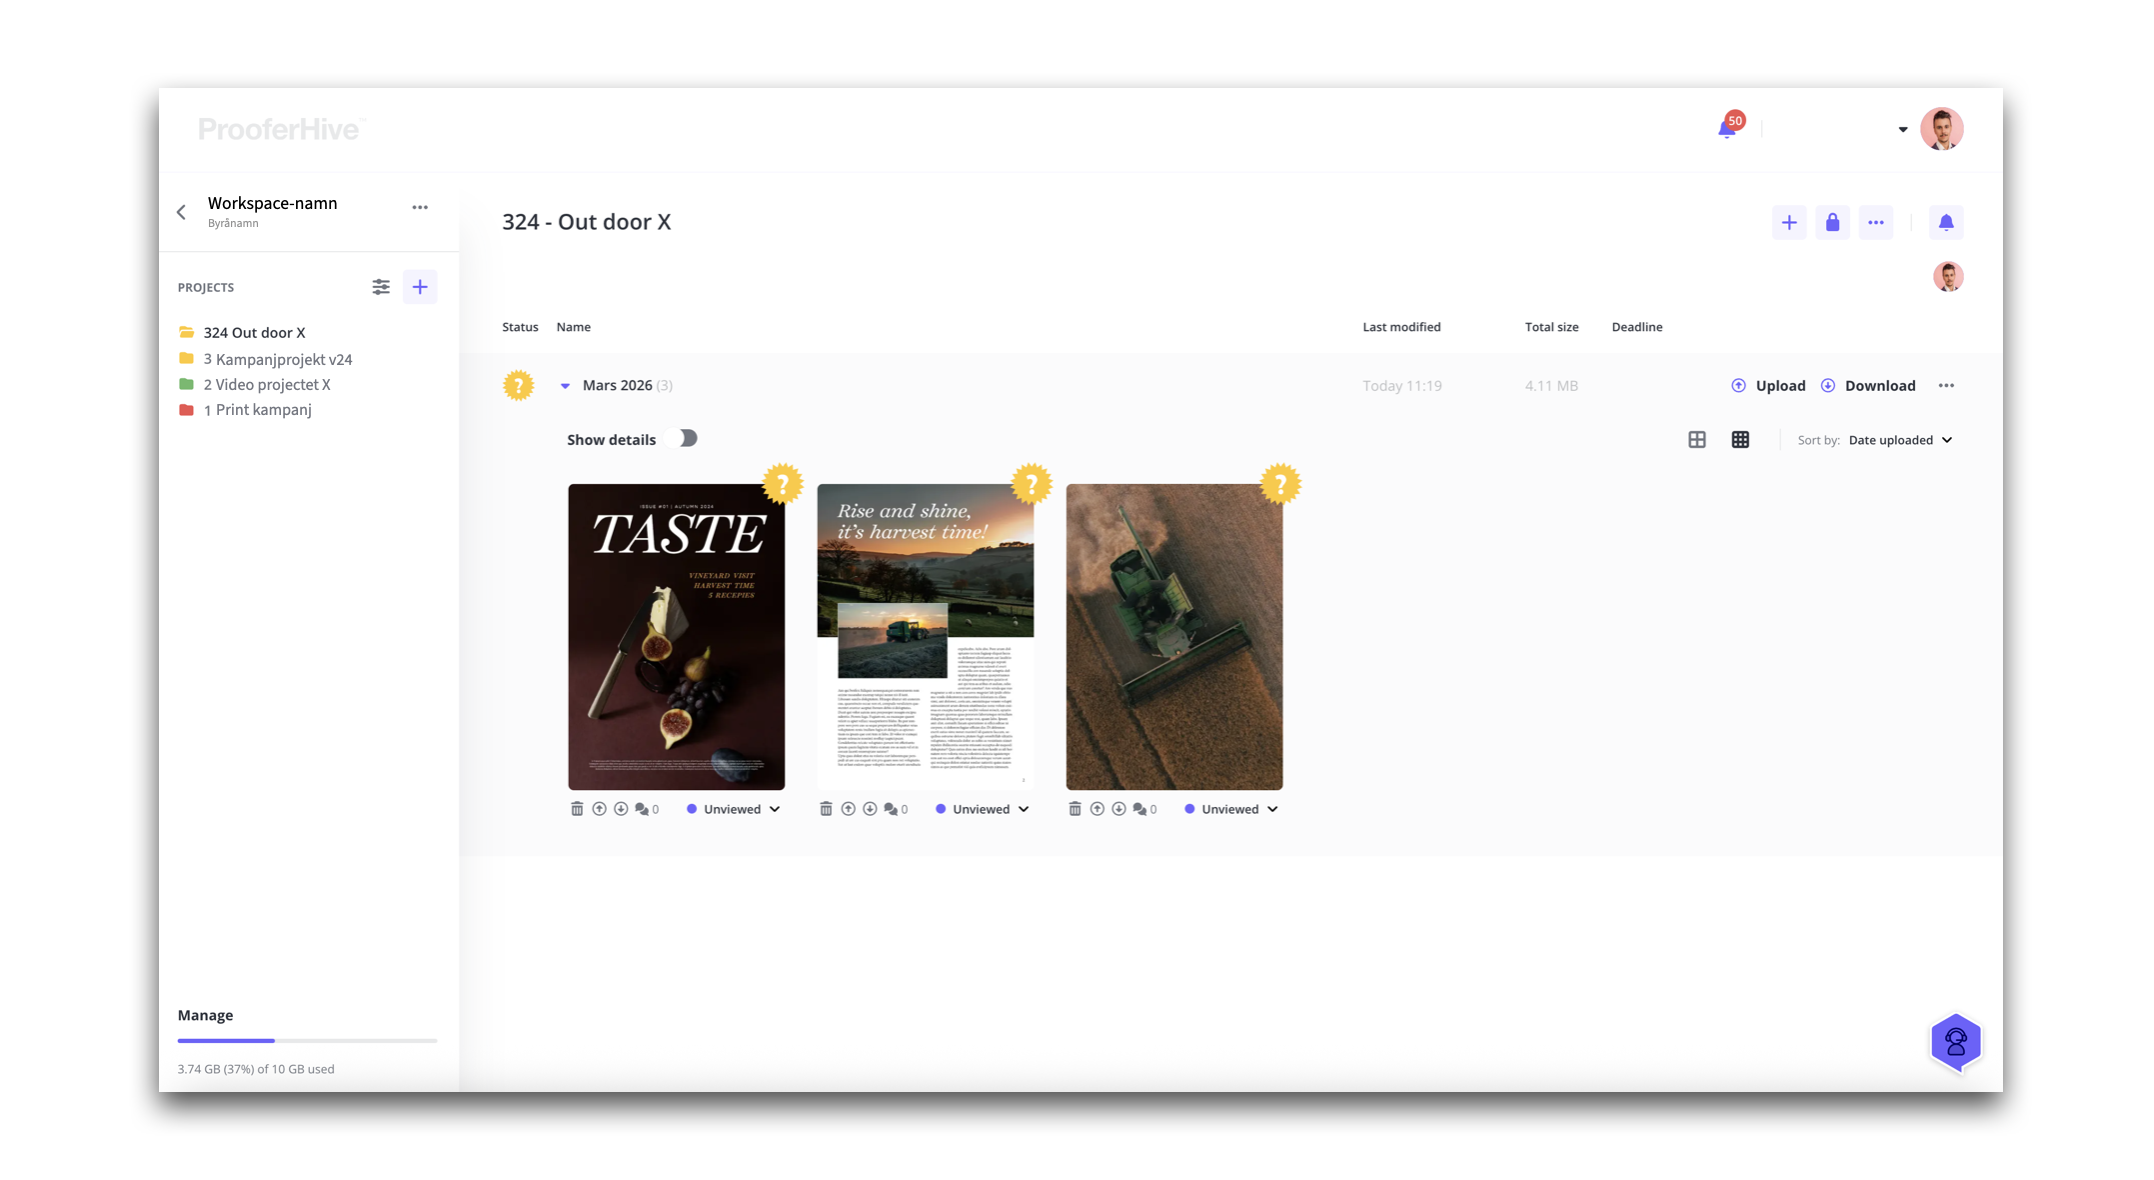
The sample project consists of one (1) tab, containing three units to review.
Files uploaded from the creator side are automatically marked yellow, ready for review, and notifications have been sent to selected reviewers.

Reviewers have access to three tools for marking and commenting.
The reviewer can also zoom, rotate and flip between pages.
When a page has been reviewed – the reviewer changes the status – and the agency receives notifications notifying them of this.